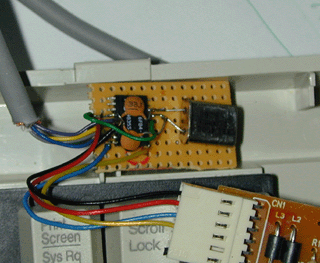
PSX keyboard
We designed two different keyboard interfaces for the PSX (version 2 is the better version)...
At last, a full PC style keyboard can be plugged into the PSX. We recommend BTC manufactured keyboards. Both of these keyboard interfaces work with our spectrum emulator for the PSX.
IMPORTANT:Build them at your own risk! You can destroy your psx by building the circuit incorrectly!!! Be especially careful to make sure that there are no bare wires, check everything and use masking tape.
We have had best success with AST and in particular BTC manufactured keyboards. Both AST and BTC tend to be budget keyboards.
Version 1.1 - Uses serial port at rear of PSX
Please be aware that not all PSXs have a serial port!
Circuit diagrams:
Both circuit diagrams for the serial version are the same, take your pick!


Click here for more detail...
Parts needed:
1 x PIC16F84-10 Microcontroller (and programmer)
1 x 10Mhz crystal
2 x 15pF to 33pF capacitors
1 x 6-pin mini-DIN PS/2 connector (optional)
1 x Serial link cable (that can be opened)
PIC Fuse settings:
Watchdog:Off, Slow Power Up:Off, Crystal:High Speed
If you do manage to somehow get it wrong and your psx boots up with a black screen and no cd activity, then you have just blown a surface mount fuse! Replace fuse #604 (located near the power in pointy on the main board) with either a normal or a surface mount 2 to 2.3 amp fuse. Surface mount fuses look like little square cubes with 2 silver-like bits at each side.

Each key has it's own Keycode and has a seperate key up code (hi-bit set)
Version 2 - Uses either pad port at front of PSX
* PSX Keyboard, plugs in either front pad port.
* PSX pad emulation mode!
* It's own 8Mhz Risc Microcontroller
* Powered from the PSX
* The unit is very easy to support, using slightly modified pad reading routines (just a new ID number)
Download Atmel AVR Microcontroller source code here (save as a .asm or .src).
NO support is given to this program and it remains the copyright of SinisterSoft Limited!
Sorry, but somehow I lost some information regarding what pins to connect to what, so to find out consult the source code!